Notebooks overview
Notebooks are SQL notebooks built into the QuestDB Web Console: each combines SQL cells, markdown notes, and live charts in a single tab. Use one to explore a dataset step by step, keep queries and commentary together, or arrange cells into an auto-refreshing dashboard.
Creating a notebook
Click the + button in the tab bar and choose New notebook. The new notebook opens as its own tab beside your SQL editors, marked with a notebook icon, and starts with a single empty SQL cell. Notebooks are named "Notebook 1", "Notebook 2", and so on until you rename them.
The AI Assistant and coding agents connected over MCP can also create notebooks for you. See Notebooks and AI.
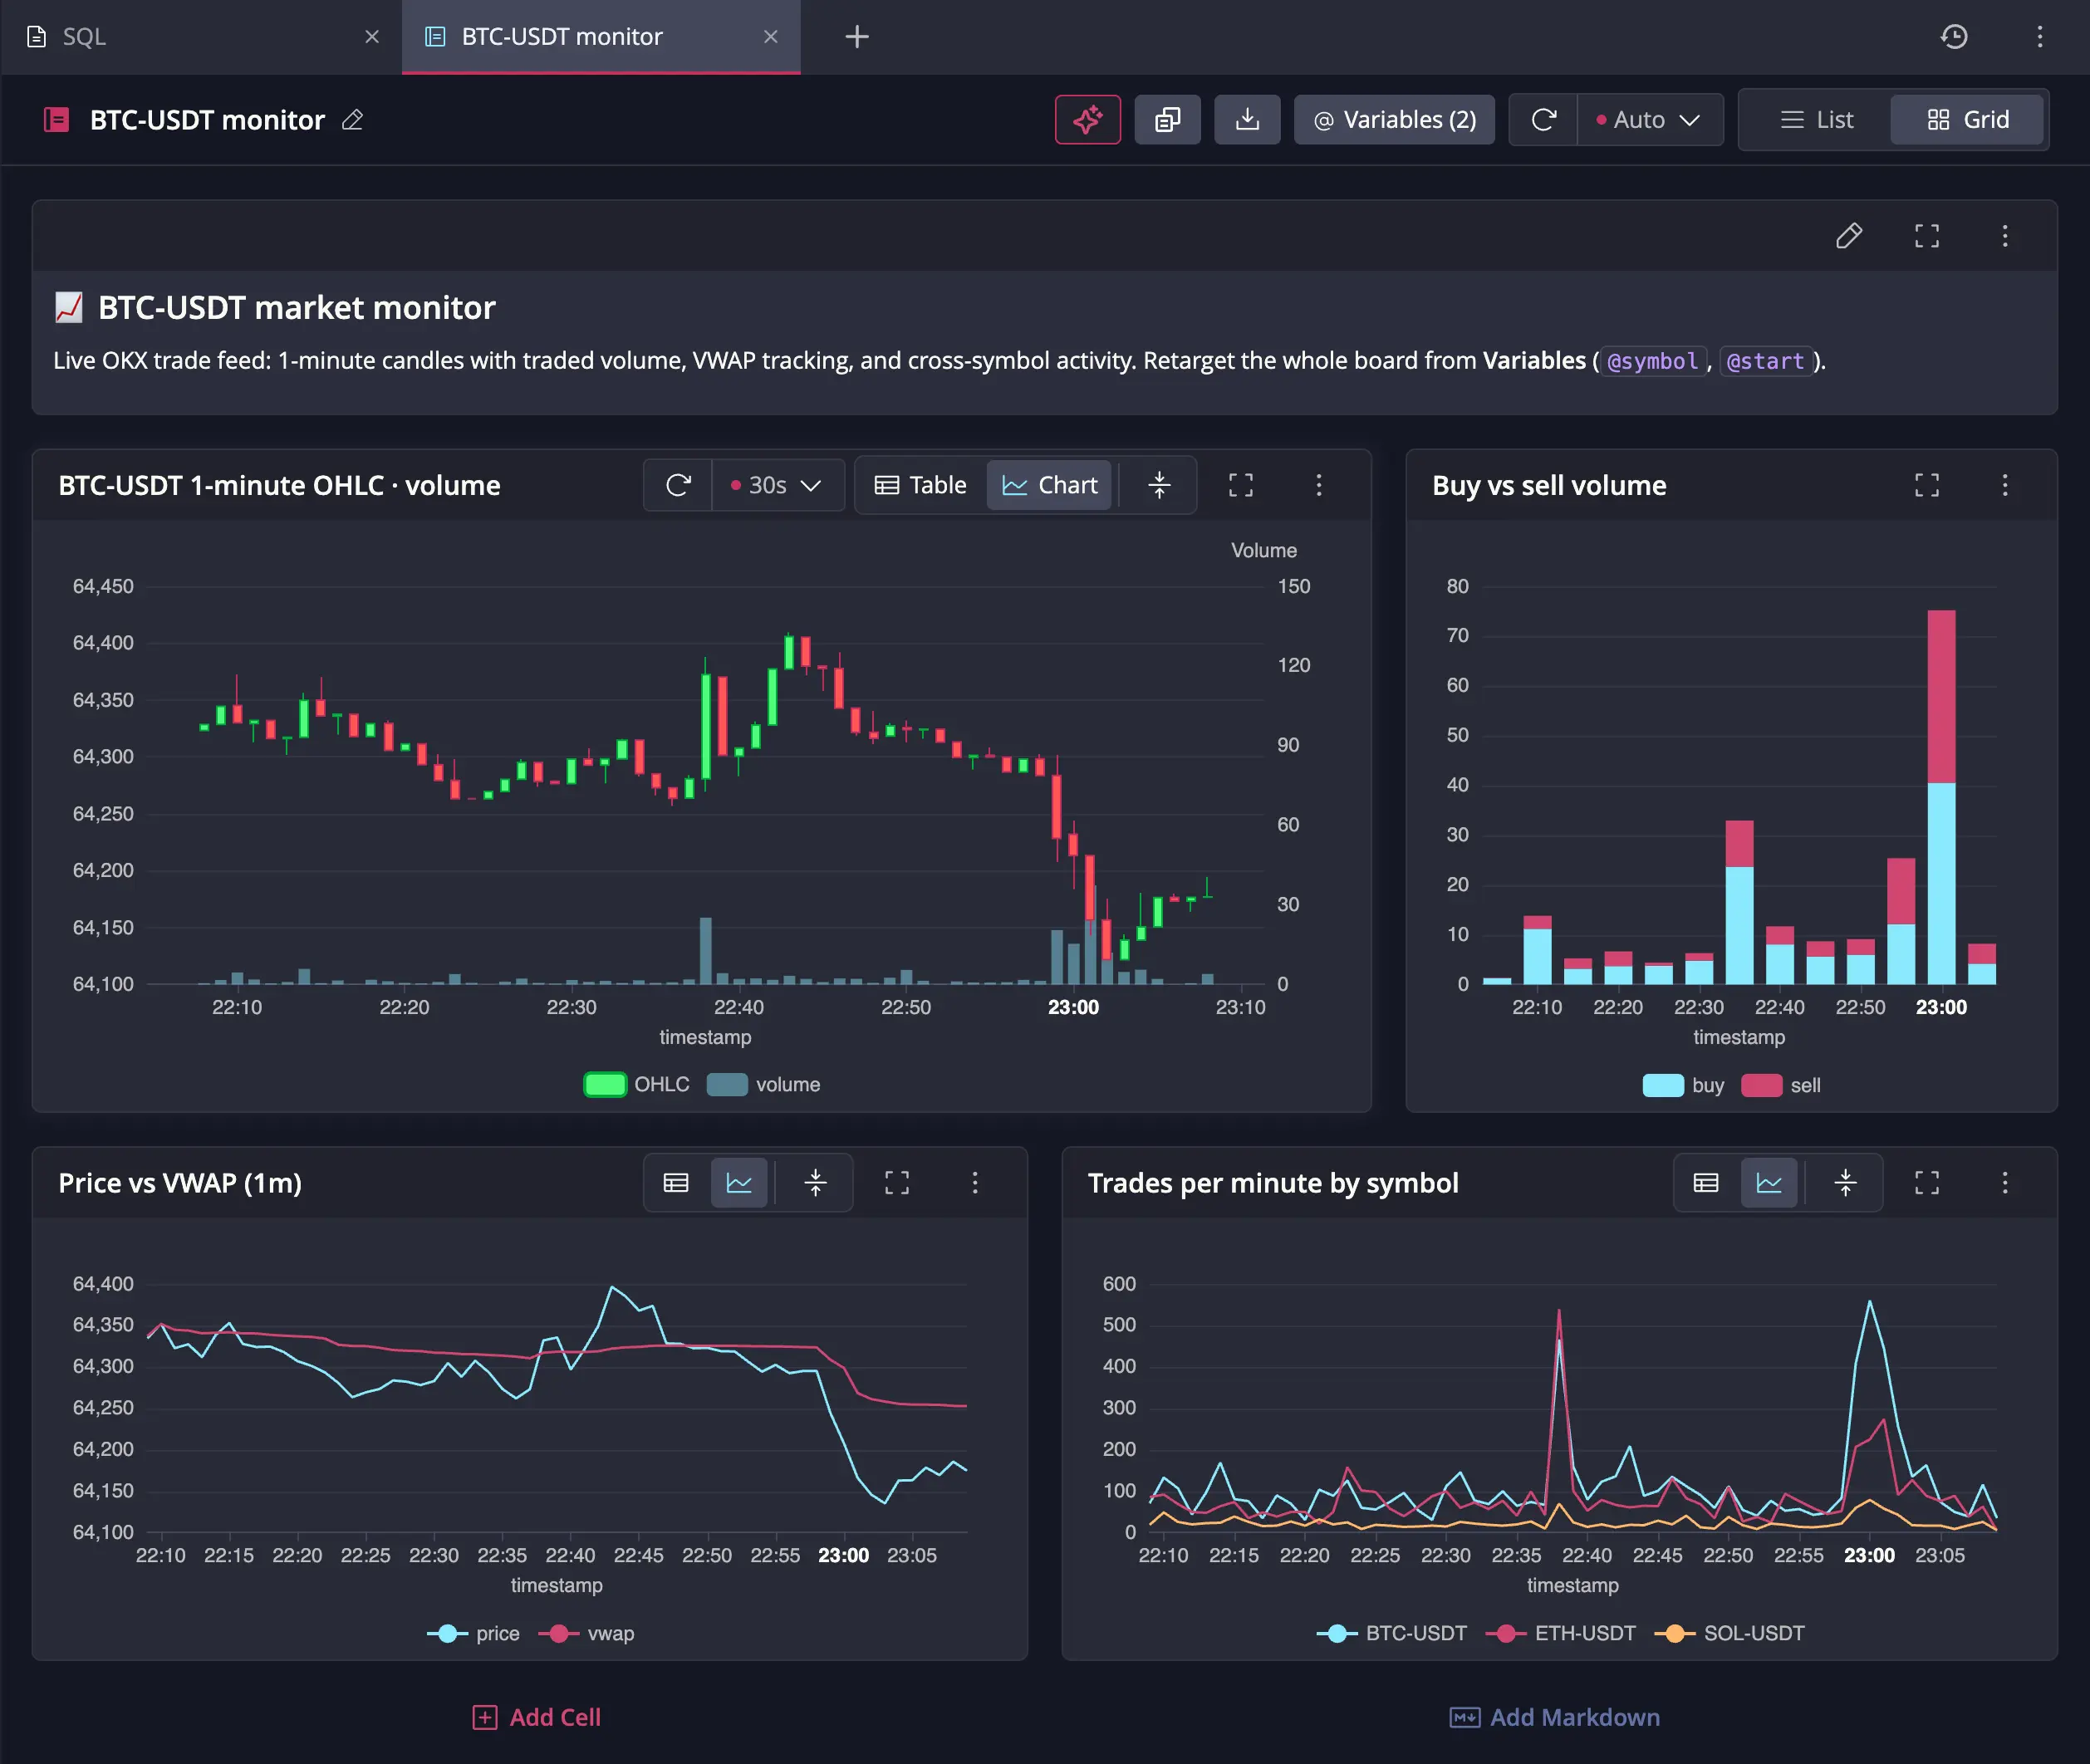
The notebook at a glance

- Notebook name: click the pencil to rename, up to 100 characters.
- Build with AI: opens an AI chat bound to this notebook. Disabled until an AI provider is configured.
- Duplicate notebook: copies the notebook, including current results.
- Export notebook: downloads the notebook as a JSON file. See Managing and sharing.
- Variables: notebook-wide
@namevariables available to every cell. See Variables. - Refresh charts: refreshes every chart at once; the dropdown sets the notebook's auto-refresh default. See Live dashboards.
- List | Grid toggle: switch between the list layout and the grid layout used for dashboards.
Below the toolbar sits the cell stack, with Add Cell and Add Markdown buttons at the end. The toolbar hides while a cell is maximized.
From query to chart
The fastest way to get a feel for notebooks:
- Type a query into the empty cell, for example per-symbol trade counts over
the last hour of
trades, and press Run (orCtrl/Cmd+Enter). The results appear as a table under the editor. - Press Draw instead, and the same query renders as a chart. The chart type is inferred from the result's shape.
- Use the Table | Chart toggle to flip between the two views without re-running the query.
Notebook cells covers running SQL in depth, and Charts covers chart types and configuration.
Notebooks and AI
Coding agents connected through the QuestDB MCP server can build and edit notebooks too. Agents work in the background without taking over your tab: when an agent changes a notebook you are not looking at, a notification appears above the MCP status pill with a View action that jumps to the change. Until you connect the MCP server for the first time, new notebooks show a dismissible card prompting you to set it up.
Learn more about the QuestDB MCP server →
Build with AI on the toolbar opens an AI chat that knows this notebook: it can add cells, write queries, and configure charts in place. Each notebook has its own conversation. The button is disabled with an explanatory tooltip until an AI provider and model are configured in AI Assistant settings.
Learn more about the AI Assistant →
Next steps
- Notebook cells covers SQL and markdown cells, running queries, and organizing the notebook
- Charts covers drawing and configuring charts
- Live dashboards covers the grid layout and auto-refresh