Managing and sharing notebooks
Notebooks live in your browser, and this page covers their lifecycle: naming, duplicating, moving them between machines, restoring closed ones, and the limits that apply.
Renaming and duplicating
Rename a notebook from the pencil icon on its tab or beside its name in the toolbar; names hold up to 100 characters. Duplicate notebook on the toolbar creates "<name> (copy)" right after the original, including its current results.
Exporting and importing
Export notebook on the toolbar downloads the notebook as a JSON file named
questdb-notebook-<timestamp>.json. It contains the cells, layout, settings,
and variables, but not query results, so an imported notebook starts clean.

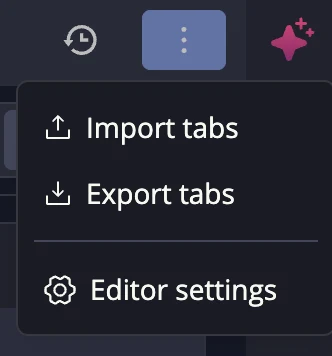
To import, use the tab bar's ⋮ menu → Import tabs, which accepts both notebook exports and full tab exports and shows a summary of what was imported. Export tabs in the same menu exports every tab, notebooks included.
Shared notebooks with permissions are coming soon to QuestDB.
Closing and restoring
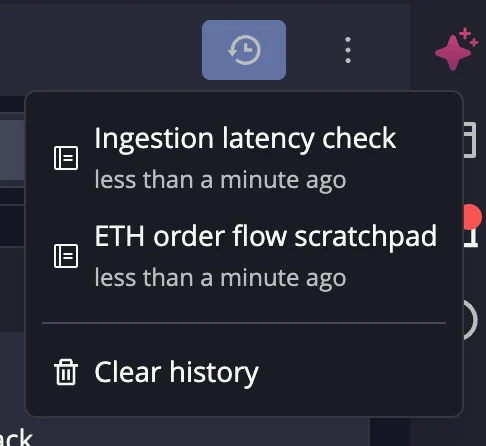
Closing a notebook tab archives it; it is never deleted outright. The history button (clock icon) at the right of the tab bar lists archived tabs; click an entry to restore it. Clear history at the bottom of that list deletes archived tabs permanently. The last remaining tab cannot be closed.
Storage and limits
Notebooks are stored in the browser, per browser and per machine. Nothing is kept on the QuestDB server, so a notebook does not follow you to another computer unless you export it. Query results are snapshotted locally too, so cells reload their last results when you return. Snapshots are kept for the ten most recently used notebooks, up to 2 MB per cell.
| Limit | Value |
|---|---|
| Cells per notebook | 200 |
| Tabs (all kinds) | 100 |
| Notebook and cell name length | 100 characters |
| Rows fetched per statement | 10,000 |
Finding content in notebooks
The console's global search indexes cell SQL, markdown text, and cell names across all notebooks. Selecting a search result opens the notebook and highlights the matching cell.
Next steps
- Live dashboards covers turning a notebook into a shareable dashboard
- Notebooks overview covers creating notebooks and the toolbar
- QuestDB MCP server lets coding agents build and edit notebooks