Deploying QuestDB on Azure
Quick reference
| Component | Recommended | Notes |
|---|---|---|
| Instance | D4s_v5 or E8s_v5 | 4-8 vCPUs, 16-64 GiB RAM |
| Storage | Premium SSD v2, 200+ GiB | 16000 IOPS / 1000 MBps |
| File system | zfs with lz4 | Or ext4 if compression not needed |
| Ports | 9000, 8812, 9009, 9003 | Restrict to known IPs only |
Infrastructure
Plan your infrastructure before launching. This section covers instance types, storage, and networking requirements.
Instance sizing
| Workload | Instance | vCPUs | RAM | Use case |
|---|---|---|---|---|
| Development | D2s_v5 | 2 | 8 GiB | Testing, small datasets |
| Production (starter) | D4s_v5 | 4 | 16 GiB | Light ingestion, moderate queries |
| Production (standard) | E8s_v5 | 8 | 64 GiB | High ingestion, complex queries |
| Production (heavy) | E16s_v5 | 16 | 128 GiB | Heavy workloads, large datasets |
Understanding Azure instance names:
| Letter | Meaning | Recommendation |
|---|---|---|
D | General purpose | Good starting point |
E | Memory optimized | Better for large datasets |
s | Premium storage capable | Required for QuestDB |
a | AMD EPYC processor | Similar performance, often cheaper |
p | ARM architecture | Avoid - limited optimization support |
Always choose instances with s in the name for Premium SSD support.
ARM instances:
Azure ARM instances (Cobalt, Ampere) are not recommended. QuestDB's JIT
compilation and SIMD optimizations are limited on ARM. Use x86_64 instances.
Storage
Premium SSD v2 (recommended):
| Workload | Size | IOPS | Throughput |
|---|---|---|---|
| Development | 50 GiB | 3000 | 125 MBps |
| Production | 200+ GiB | 16000 | 1000 MBps |
| High I/O | 500+ GiB | 16000+ | 1000+ MBps |
Premium SSD v2 lets you provision IOPS and throughput independently of size. Separate your OS disk (30 GiB) from your data disk.
Premium SSD v2 throughput is limited by VM size. Check your instance's maximum disk throughput in the Azure documentation before provisioning.
Premium SSD (alternative):
If Premium SSD v2 is unavailable, use Premium SSD with these minimum sizes:
| Tier | Size | IOPS | Throughput | Use case |
|---|---|---|---|---|
| P20 | 512 GiB | 2300 | 150 MBps | Development |
| P30 | 1 TiB | 5000 | 200 MBps | Light production |
| P40 | 2 TiB | 7500 | 250 MBps | Production |
Premium SSD ties performance to disk size - you may need to over-provision capacity to get required IOPS.
Redundancy considerations:
- Premium SSD v2 only supports locally-redundant storage (LRS)
- Premium SSD supports zone-redundant storage (ZRS)
- For LRS disks, take regular ZRS snapshots or use QuestDB Enterprise replication
File system:
Use zfs with lz4 compression to reduce storage costs. If you don't need
compression, ext4 or xfs offer slightly better performance.
Unsupported storage:
- Azure NetApp Files - Not supported as primary storage (NFS latency too high)
- blobfuse2 - Not supported for database workloads
- Blob Storage - Supported for Enterprise replication only, not primary storage
Networking
Network Security Group (NSG) rules:
| Port | Protocol | Source | Purpose |
|---|---|---|---|
| 22 | TCP | Your IP | SSH access |
| 9000 | TCP | Your IP / VNet | Web Console & REST API |
| 8812 | TCP | Your IP / VNet | PostgreSQL wire protocol |
| 9009 | TCP | Application servers | InfluxDB line protocol |
| 9003 | TCP | Monitoring servers | Health check & Prometheus |
Never set source to * or Any for ports 9000, 8812, or 9009. Restrict access
to known IP ranges or use Azure Bastion for secure access.
VNet recommendations:
- Deploy QuestDB in a private subnet
- Use Azure Bastion or a jump box for SSH access
- Use Private Endpoints for Blob Storage (Enterprise replication)
- Consider proximity placement groups for low-latency application access
Deployment
Deploy QuestDB on an Azure Virtual Machine.
Prerequisites
- Microsoft Azure account with billing enabled
- SSH key pair for secure access
Create the VM
- In the Azure Portal, navigate to Virtual Machines
- Click Create → Azure virtual machine
- Configure basics:
- Select or create a Resource group
- Enter a Virtual machine name
- Select your Region and Availability zone
- Choose Ubuntu 24.04 LTS for the image
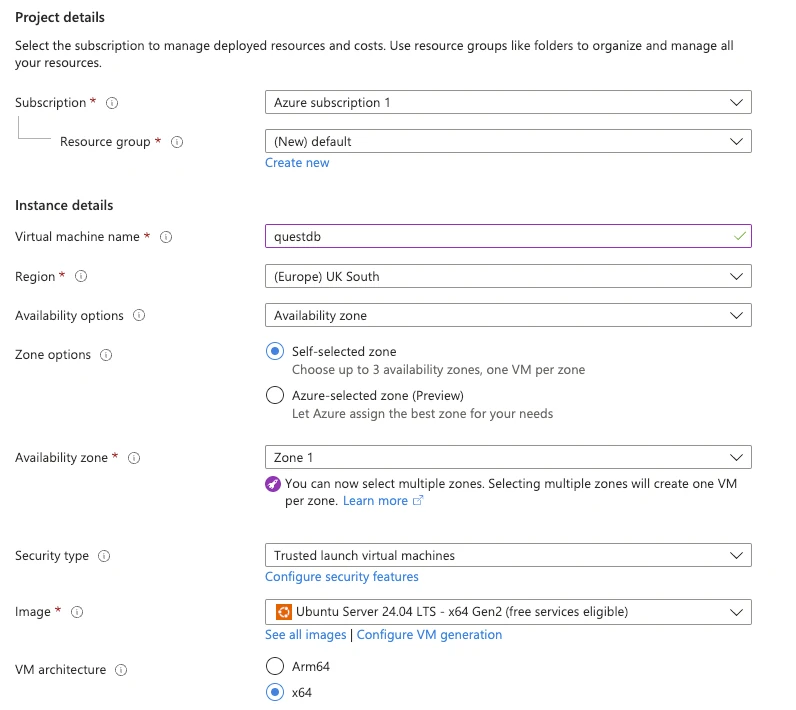
- Select your instance size (see Instance sizing)
- Configure SSH authentication:
- Select SSH public key
- Create a new key pair or use existing
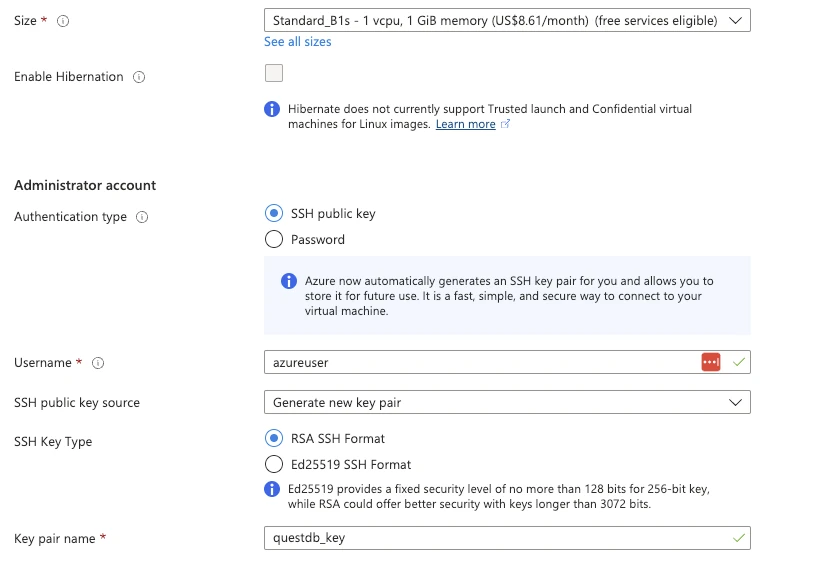
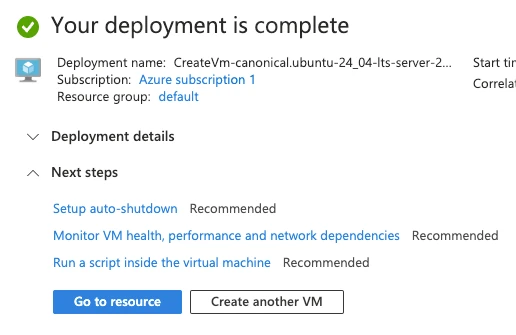
- Click Review + create, then Create
- Download the private key when prompted
Configure networking
- Go to your VM's Networking settings
- Click Add inbound port rule
- Add rules for QuestDB ports (see Networking):
- Set Destination port ranges to
9000,8812,9003 - Set Source to your IP range (not
Any) - Set Protocol to
TCP - Name the rule
questdb
- Set Destination port ranges to

Only add port 9009 if you need ILP ingestion, and restrict the source to your application servers.
Install QuestDB
- Connect via SSH:
chmod 400 ~/Downloads/your_key.pem
ssh -i ~/Downloads/your_key.pem azureuser@<your-vm-ip>
- Download and start QuestDB:
wget https://github.com/questdb/questdb/releases/download/9.3.4/questdb-9.3.4-rt-linux-x86-64.tar.gz
tar xzf questdb-9.3.4-rt-linux-x86-64.tar.gz
cd questdb-9.3.4-rt-linux-x86-64/bin
./questdb.sh start
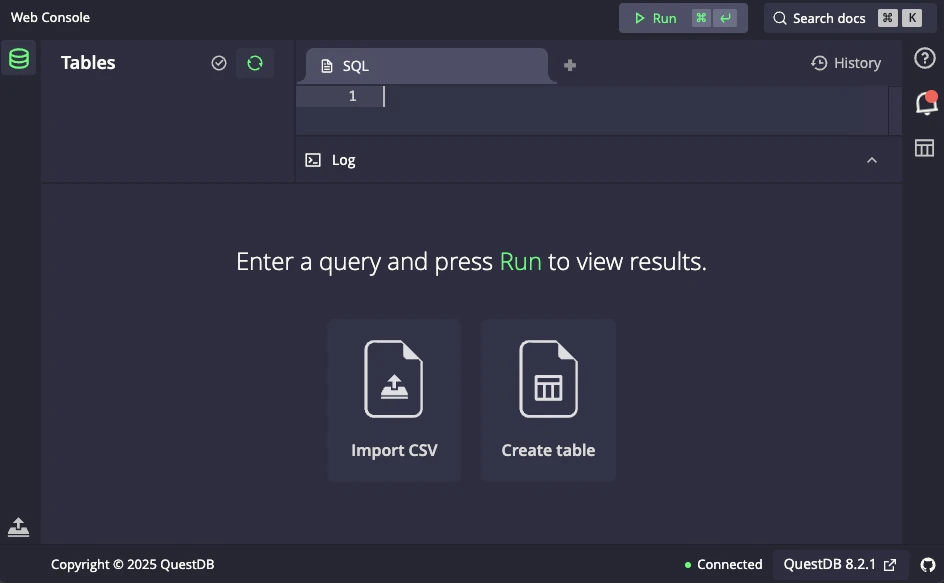
- Access the Web Console at
http://<your-vm-ip>:9000
For production deployments, use systemd to manage the QuestDB service.
Security
Change default credentials
Update credentials immediately after deployment.
Web Console and REST API - edit conf/server.conf:
http.user=your_username
http.password=your_secure_password
PostgreSQL - edit conf/server.conf:
pg.user=your_username
pg.password=your_secure_password
InfluxDB line protocol - edit conf/auth.json. See
ILP authentication.
Restart after changes:
./questdb.sh stop
./questdb.sh start
Disable unused interfaces
Reduce attack surface by disabling protocols you don't use:
pg.enabled=false           # Disable PostgreSQL
line.tcp.enabled=false     # Disable ILP
http.enabled=false         # Disable Web Console & REST API
http.security.readonly=true  # Or make HTTP read-only
Operations
Upgrading
-
Stop QuestDB:
./questdb.sh stop -
Back up your data directory
-
Download and extract the new version:
wget https://github.com/questdb/questdb/releases/download/9.3.4/questdb-9.3.4-rt-linux-x86-64.tar.gz
tar xzf questdb-9.3.4-rt-linux-x86-64.tar.gz
- Start the new version:
cd questdb-*/bin
./questdb.sh start
Monitoring
Health check:
curl http://localhost:9003/status
Prometheus metrics:
curl http://localhost:9003/metrics
Azure Monitor integration:
Use the Azure Monitor agent to collect:
- VM metrics (CPU, memory, disk I/O)
- QuestDB logs from the
log/directory - Custom metrics from the Prometheus endpoint
Enterprise on Azure
QuestDB Enterprise adds production features for Azure:
- Blob Storage replication - Continuous backup for durability
- Cold storage - Move old partitions to Blob Storage, query on-demand
- High availability - Automatic failover across instances
- EntraID SSO - Single sign-on with Microsoft Entra ID
For EntraID integration, see the Microsoft EntraID OIDC guide.
See Enterprise Quick Start for setup.